Homeschooling: DIY Science Labs

Homeschooling: DIY Science Labs for Hands-On Learning

Science is a subject that thrives on curiosity, experimentation, and discovery. For homeschooling families, creating DIY science labs at home offers a unique opportunity to engage students in hands-on learning that brings scientific concepts to life. With a little creativity and some basic supplies, you can transform your homeschool environment into a dynamic space for scientific exploration. Here’s how to set up and conduct some DIY science labs that will hopefully inspire a love for science.


The Benefits of DIY Science Labs

  1. Hands-On Learning: DIY science labs allow students to actively engage with the material and develop a deeper understanding of scientific principles. By conducting experiments themselves, students can observe cause-and-effect relationships, make predictions, and test hypotheses. This will enhance their critical thinking and problem-solving skills.
  2. Flexibility and Customization: Homeschooling provides the flexibility to tailor science experiments to your child’s interests and learning level. You can choose experiments that align with their passions, whether that’s chemistry, physics, or biology, and make science more relevant and enjoyable.
  3. Practical Application of Knowledge: DIY science labs allow students to apply theoretical concepts to practical situations. This real-world application reinforces what they’ve learned and helps them see the relevance of science in everyday life. For example, a simple plant growth experiment can teach students about photosynthesis, while also giving them the experience of helping and watching a living thing grow.

Setting Up a DIY Science Lab at Home

  1. Gather Basic Supplies: Setting up a home science lab doesn’t require expensive equipment. Start with basic supplies like beakers, measuring cups, pipettes, thermometers, gloves, and safety goggles. Many experiments can be conducted with household items such as vinegar, baking soda, food coloring, and common kitchen utensils.
  2. Create a Safe and Organized Space: Designate a specific area in your home for conducting experiments. Ensure this space is well-ventilated, easy to clean, and free from clutter and distractions. Safety is paramount, so make sure to keep hazardous materials out of reach and always supervise experiments, especially those involving heat, chemicals, or sharp objects.
  3. Choose Age-Appropriate Experiments: Select experiments that are suitable for your child’s age and understanding. Younger children can start with simple projects like making a volcano with baking soda and vinegar or observing how plants grow in different conditions. Older students might explore more complex topics like building simple circuits or conducting chemical reactions.

Conducting DIY Science Experiments

  1. Follow the Scientific Method: Encourage students to follow the scientific method, which involves asking a question, forming a hypothesis, conducting an experiment, observing the results, and drawing a conclusion. This structured approach teaches students how to think like scientists and develop analytical skills.
  2. Document and Reflect: Have students document their experiments in a science journal. They should record their hypothesis, the materials used, the procedure, and their observations. After the experiment, prompt them to reflect on the outcome: Was their hypothesis correct? What did they learn? What would they do differently next time?
  3. Incorporate Cross-Disciplinary Learning: Science experiments can be an excellent way to integrate learning across different subjects. For example, while conducting an experiment on water density, students can also practice math skills by measuring and calculating ratios. Writing up lab reports can enhance their written language skills, and discussing the environmental impact of their experiments can introduce elements of environmental science and social studies.

Expanding the Learning Experience

  1. Explore Virtual Labs and Online Resources: Many online platforms offer virtual labs and simulations that complement hands-on experiments. These resources can help students explore concepts that might be difficult to replicate at home, such as complex chemical reactions or advanced physics principles.
  2. Connect with the Homeschool Community: Join homeschool groups or online forums to share ideas and resources for DIY science labs. Collaborating with other families can provide new experiment ideas, offer support, and create opportunities for group learning experiences.


Examples of DIY Science Labs

Changing the Color of Flowers (appropriate for ages 5-8)

Materials: White flowers (like carnations); food coloring; a couple of cups, jars, or vases
Instructions:
1. Add water to as many cups as you have flowers!
2. Stir 10-15 drops of food coloring into each cup.
3. Trim the stem of each flower and then put one flower in each cup. Observe how the flower petals change colors!
Scientific Concept: Capillary action, the process by which water moves through the tiny tubes (called xylem) in the stem of the plant.


Invisible Ink
(appropriate for ages 9-13)

Materials: Lemon juice, cotton swabs, white paper, and a light source (e.g., a lamp or candle).
Instructions:
1. Use a cotton swab dipped in lemon juice to write a message on the paper. Let it dry.
2. To reveal the message, hold the paper near a heat source (safely)
Scientific Concept: Heat causes the lemon juice to oxidize, making it visible.


Build a Simple Electromagnet
(appropriate for ages 14-18)

Materials: Copper wire, a large nail, a D battery, and paperclips.
Instructions:
1. Wrap the copper wire around the nail, leaving some wire free at each end.
2. Connect the wire ends to the battery terminals (temporarily).
3. Use the nail to pick up paperclips.
Scientific Concept: Electricity creates a magnetic field, demonstrating electromagnetism.

Conclusion

DIY science labs are an invaluable part of homeschooling, offering students the chance to engage directly with scientific concepts and develop a love for inquiry-based learning. By setting up a safe and organized space, choosing appropriate experiments, and guiding students through the scientific method, you can create a rich and stimulating educational experience at home.

For those looking for additional support, expert homeschool education teachers at Hodis Learning & Music can safely lead students through fun, at-home science labs, ensuring that your child’s science education is both comprehensive and inspiring. Learn more by calling or submitting a form on our website.

Language Learning In Homeschooling Techniques And Tools

Language learning is an enriching aspect of education, offering students a window into different cultures, expanding cognitive skills, and opening doors to new opportunities. When homeschooling, language learning can be a flexible and personalized experience. With the right techniques and tools, homeschoolers can make significant progress in acquiring a new language while enjoying the journey. This blog post explores effective techniques and useful tools for language learning in a homeschooling setting.


Techniques for Effective Language Learning

Successful language learning involves more than just memorizing vocabulary and grammar rules. It requires a holistic approach that encourages communication, cultural immersion, and consistent practice. Here are some effective techniques for homeschooling language learners:


1. Immersive Learning

Immersion is one of the most effective ways to learn a language. In a homeschool setting, this can be achieved through various means. Encourage your child to watch movies or shows in the target language, listen to music, and read books or articles. This exposure helps build vocabulary and reinforces grammar structures in a natural context. Additionally, consider incorporating language into daily routines, such as labeling objects around the house with their names in the target language.


2. Language Games and Activities

Learning a new language should be fun. Language games and activities engage students in a playful way, helping to reinforce concepts without feeling like work. There are countless language-based games, from flashcards and word puzzles to board games designed for language learning. These activities can be a great addition to a homeschooling curriculum, providing an enjoyable way to practice language skills.


3. Conversational Practice

One of the most critical aspects of language learning is conversational practice. Seek out opportunities for your child to speak with native speakers or other language learners. This can be through language exchange programs, online forums, or local language clubs. Encourage regular practice to build confidence and fluency. If you’re learning the language as a family, make it a point to engage in conversations in the target language during specific times or activities.


4. Incorporate Technology

Technology plays a vital role in modern language learning. Use language learning apps and online resources to supplement traditional teaching methods. Apps like Duolingo, Rosetta Stone, and Babbel offer interactive lessons and exercises that make learning engaging and accessible. Online platforms like iTalki and Preply allow you to connect with native speakers for one-on-one lessons, providing personalized guidance and real-time feedback.

5. Tools to Enhance Language Learning

In addition to techniques, having the right tools can significantly impact the effectiveness of language learning in homeschooling. Here are some essential tools to consider:

  • Bilingual Dictionaries: A good bilingual dictionary is invaluable for language learning. It helps students quickly look up words, understand their meanings, and learn proper pronunciation. Choose a dictionary that’s comprehensive yet easy to use, and encourage your child to use it regularly.
  • Language Learning Software: Language learning software can be a fantastic addition to a homeschooling curriculum. These programs often offer interactive lessons, exercises, and quizzes to reinforce learning. Look for software that aligns with your child’s learning style and provides a clear progression through different language levels.
  • Cultural Resources: Language learning is deeply connected to culture. Include cultural resources like books, movies, music, and food from the target language’s culture. This immersion helps students understand the context behind the language and fosters a deeper appreciation for it.


Takeaway

By incorporating these techniques and tools into your homeschooling curriculum, you can create a rich and engaging language learning experience. Whether your child is learning a language for academic purposes, travel, or personal interest, the flexibility of homeschooling allows you to tailor the learning process to suit their unique needs and goals.


Enroll in Our Expert Homeschool Education Program

Our expert foreign language teachers have years of experience leading students to success in their language development. Learn more about our homeschool education program by calling or emailing us.

Setting Up The Perfect Homeschool Environment

Creating the perfect homeschool environment is essential for promoting learning, focus, and creativity. Unlike traditional classrooms, homeschooling allows for flexible arrangements tailored to the needs and preferences of your family. Whether you’re new to homeschooling or looking to improve your current setup, here are some key elements to consider when designing your ideal homeschool environment.


Choose a Dedicated Space

The first step in creating a homeschool environment is designating a specific area for learning. This doesn’t mean you need a dedicated room; a corner of a living room or kitchen can work just as well. The important thing is to have a consistent space where learning occurs, helping your child transition into “school mode.” Make sure it’s free from distractions and has good lighting.


Invest in Essential Furniture

Once you’ve chosen your space, it’s time to add furniture that fosters comfort and focus. A sturdy desk or table with ample space for books, notebooks, and learning materials is crucial. Include comfortable chairs that support good posture, especially for longer study sessions. Consider additional storage options, such as bookshelves or bins, to keep the area organized and clutter-free.


Ensure Proper Lighting

Good lighting is crucial for maintaining focus and reducing eye strain. Natural light is ideal, so position your homeschool area near a window if possible. If natural light is limited, invest in quality lighting fixtures with adjustable brightness. Desk lamps with adjustable arms can be useful for targeted lighting during reading and writing tasks.


Organize Supplies and Materials

Keeping your homeschool environment organized helps maintain a sense of order and reduces stress. Use bins, baskets, or drawers to store supplies like pencils, markers, and paper. Label storage containers for easy identification, and keep frequently used items within arm’s reach. This organization will help streamline your daily routines and encourage a more efficient learning process.


Create a Visual Learning Space

A visually stimulating environment can enhance learning and engagement. Consider adding a whiteboard or corkboard to display schedules, to-do lists, and educational materials. These visual aids can serve as reminders and help your child stay on track. Additionally, include educational posters, maps, or artwork that reflect your child’s interests and learning topics.

Incorporate Technology Wisely

Technology plays a significant role in modern homeschooling. Equip your homeschool area with a reliable computer or tablet for accessing online resources and educational software. Ensure your internet connection is strong enough to support video lessons and virtual learning activities. However, balance technology use with offline activities to maintain a well-rounded educational experience.


Allow Flexibility and Creativity

While structure is essential, flexibility is also key to a successful homeschool environment. Encourage your child to personalize their space with decorations or favorite items that inspire creativity. Incorporate flexible seating options like floor cushions or bean bags for relaxed reading or project work. This flexibility allows your child to find their comfort zone and adapt to different learning styles.


Designate a Break Area

Homeschooling isn’t all about academics; breaks are crucial for maintaining focus and reducing stress. Create a designated break area where your child can relax, play, or engage in physical activities. This space can be as simple as a play mat or as elaborate as an outdoor play area. Regular breaks will help keep your child refreshed and ready to learn.


Takeaway

By setting up the perfect homeschool environment, you can create a space that promotes learning, creativity, and well-being. With careful planning and a focus on both structure and flexibility, your homeschool environment can become a nurturing and inspiring place for your child’s educational journey.

Enroll in Our Expert, 1-on-1 Homeschool Program Today!

Our expert homeschool teachers can help your student set up the most optimal homeschool environment. Our teachers have years of experience educating K-12 students in their areas of expertise. Learn more about our homeschool education program by calling or emailing us today.

Exploring Textures in Art

Texture plays a vital role in art, bringing life and dimension to an otherwise flat surface. Artists can create textures that are rough, smooth, soft, or even illusionary, adding richness and complexity to their work. In this post, we’ll explore how artists can incorporate and replicate textures in their art using techniques that apply to both painting and drawing. Whether you’re aiming to capture the softness of fur, the roughness of bark, or the smoothness of glass, these tips will guide you on how to achieve realistic, expressive textures.


1. Understanding Texture: Why It Matters

Texture in art can be tactile, a real, physical texture you can feel, or visual, the illusion of texture created on a flat surface. Both types of texture help create depth, engage the viewer’s senses, and bring the subject to life. Texture adds character and can evoke emotions, encouraging the viewer to connect with the piece on a sensory level.

When artists add texture, they’re not just reproducing the look of an object—they’re also adding narrative elements, guiding viewers through an experience with the subject.


2. Techniques for Creating Texture in Painting

Painting offers endless possibilities for creating a variety of textures. Here are some versatile techniques to get started:

– Impasto: Impasto is a technique where paint is applied thickly, creating raised, three-dimensional areas on the canvas. This technique is great for adding texture to objects like rocks, leaves, or clouds. Use a palette knife or a thick brush to layer the paint heavily and build up a physical texture.

– Dry Brushing: To create a rough or grainy texture, use a dry brush with very little paint on it. Lightly drag it across the surface for a broken, textured effect that’s ideal for surfaces like wood, hair, or fabric. Varying the angle and pressure will give even more depth to the effect.

– Sponging and Dabbing: Sponges, paper towels, or even crumpled plastic wrap can be dabbed or pressed into wet paint to create organic, unpredictable textures. This method works especially well for natural elements like leaves, rocks, and mossy surfaces.

– Scumbling: Scumbling involves lightly dragging a dry brush with paint over a painted surface to create a translucent layer. This technique is useful for soft textures, such as clouds, mist, or fabric folds, as it gives a hazy, subtle effect.

Tip: Experiment with various tools like combs, toothbrushes, or even your fingers. Each tool creates unique textures and adds variety to your painting.


3. Techniques for Creating Texture in Drawing

In drawing, texture is created through line work, shading, and pattern. Here are several techniques to try:

– Hatching and Cross-Hatching: These are among the most commonly used methods for adding texture. Hatching involves drawing parallel lines, while cross-hatching layers lines at different angles. This technique can convey rough textures like woven fabric, rough paper, or the skin of certain fruits.

– Stippling: Stippling uses small dots to create texture and shading. Closer, denser dots create darker tones and rough textures, while spaced-out dots make the texture appear lighter and softer. Stippling is time-intensive but is highly effective for natural textures, such as sand or stone.

– Blending and Smudging: Blending pencils or charcoal with tools like tortillons (blending stumps) or even your finger can create smooth, soft textures, perfect for things like skin, cloth, or glass. Experiment with different pressures to vary the effect.

– Sgraffito: This technique involves scratching away a layer to reveal what’s underneath. To use sgraffito in pencil drawing, you can shade an area densely and then use an eraser or a sharp point to scratch in details, like the veins in leaves or fur texture.

Tip: Explore the texture of different papers as well. Rougher paper enhances the effect of pencil strokes, creating a more tactile feel.


4. Combining Techniques to Create Realistic Textures

– Skin and Fur: Begin with a base layer of blending to capture the smoothness of skin or the density of fur, then add details using cross-hatching or fine lines to mimic pores, wrinkles, or individual hairs.

– Water and Reflections: Start with a smooth base, using blending or wet-on-wet painting to capture water’s fluid quality. Then, add ripples, highlights, or reflections with light, broken brushstrokes or eraser marks for realism.

– Stone and Brick: Use sponging or stippling to create an irregular surface, then add details like cracks or rough edges with fine hatching or dry brushing to capture the gritty surface of stone or brick.

Tip: To fully develop these textures, observe your subject carefully. Study how light interacts with the texture, as this can make all the difference in creating realism.


5. Tips for Applying Texture Thoughtfully

– Emphasize Key Areas: Use more texture in focal areas where you want to draw the viewer’s attention, and keep the background or less important elements smoother or simpler.

– Create Contrast: Combining rough and smooth textures adds visual contrast and interest. For example, place a rough, impasto texture next to a smooth, blended area to emphasize both textures.

– Practice Observation: Study textures around you—brick walls, tree bark, fabric, glass surfaces—and try replicating them in small sketches or swatches to get comfortable with the techniques.

– Balance Detail and Simplicity: Use texture in moderation. Sometimes, less is more when it comes to adding texture to a piece. Decide on the purpose of each texture and keep it cohesive with the overall piece.


Conclusion

Textures give life, depth, and realism to artworks, bridging the gap between a two-dimensional surface and the rich sensory world we experience. By experimenting with these techniques, artists can capture the essence of their subjects, whether they’re aiming to depict the delicate softness of a petal or the ruggedness of a mountain. So grab your tools, experiment, and let texture bring new dimensions to your art!


Discover Your Unique Style with Hodis Learning & Music

At Hodis Learning & Music, we offer art lessons that cover a wide range of techniques, including creating realistic and expressive textures. Our experienced instructors work with students at all skill levels, helping them to discover and refine their unique style. Whether you’re interested in drawing, painting, or exploring other mediums, we’re here to support your creative journey. Call or email us today to learn more and start bringing texture and life to your art!

Mastering Landscape Painting

Landscape painting invites artists to explore the beauty of the natural world, capturing its colors, shapes, and emotions on canvas. Whether you’re painting a tranquil forest, a dramatic mountain range, or a bustling urban park, understanding the foundational techniques of landscape painting is essential to capturing each scene’s unique character. In this guide, we’ll explore essential techniques and tips for painting landscapes, focusing on perspective, atmospheric effects, and the nuances of different environments.


1. The Importance of Perspective in Landscape Painting

Perspective is one of the most crucial techniques in landscape painting, as it adds depth and realism to a flat surface. There are two main types to consider: linear perspective and aerial perspective.

Linear Perspective: Linear perspective uses converging lines to create the illusion of depth. To achieve this, identify a horizon line and establish one or more vanishing points—points where parallel lines converge. This technique helps to create a sense of distance and structure, particularly in landscapes with paths, roads, or architectural elements.

Aerial (or Atmospheric) Perspective: Aerial perspective relies on color and value to create depth. Objects in the foreground are typically painted with sharper, warmer tones, while those in the background appear lighter, cooler, and slightly blurred. This gradual change in color and detail mimics how the human eye perceives distance and enhances the three-dimensionality of your landscape.

Tip: When starting your painting, sketch the horizon line and place a few basic elements in the foreground, midground, and background to help establish a solid foundation for perspective.


2. Creating Atmospheric Effects

Atmospheric effects, such as light, weather, and time of day, add a dynamic quality to landscapes. Mastering these elements brings life and movement to your work, conveying a specific mood or feeling.

– Light and Shadow: Light changes throughout the day, affecting colors and contrast. Observe how light behaves at different times—soft and warm at sunrise, harsh and bright at midday, or muted and golden at dusk. Use a range of tones to capture the direction and quality of light, and remember that shadows in nature aren’t just black or gray; they often carry hints of color from the surrounding environment.

– Weather Conditions: Weather adds variety to landscapes. For a rainy scene, consider using muted colors and softer brushstrokes to create a hazy effect. For a sunny day, use bright, warm colors and crisp edges. For foggy scenes, keep distant elements indistinct, blending colors to capture the softening effect of mist.

– Seasonal Changes: Each season offers unique color palettes and textures. Spring landscapes may be rich in greens and pastels, while autumn scenes feature warmer, earthy tones. Adjusting your palette and brush techniques to reflect the season helps capture the essence of each setting.

Tip: Experiment with transparent layers (glazing) to capture the subtle shifts in light and atmosphere. Thin washes of color can help you build realistic transitions and make the scene appear more natural.


3. Capturing the Essence of Different Environments

Each type of landscape, from forests to coastal cliffs, has distinct characteristics. Understanding these can help you authentically capture the essence of each environment.

– Forests and Woodlands: Forests often feature overlapping layers of trees and foliage. To paint them realistically, focus on building texture and depth. Use a mix of short, textured brushstrokes for leaves and branches, and vary the green tones to reflect the light filtering through the canopy. Forest floors may have scattered leaves, rocks, or moss, which can be painted with small, detailed strokes for added realism.

– Mountains and Cliffs: Mountains and rocky landscapes have strong, angular shapes. Use bold strokes and a limited color palette to create the rugged look of rocks and cliffs. Shadows play an essential role here, so pay attention to the direction of light and how it interacts with the irregular surfaces. Blending cool and warm grays can help capture the texture of stone.

– Water and Reflections: Painting water involves capturing its movement and reflections. For still water, use horizontal brushstrokes and focus on mirroring nearby elements. For waves or rivers, use varied, sweeping strokes to show the flow and add highlights to represent light hitting the water’s surface. Remember that reflections are softer and often slightly darker than the objects they mirror.

– Urban Landscapes: Urban landscapes require a mix of structured perspective and atmospheric effects. Start by establishing strong lines for buildings, roads, and other man-made structures. Add life with soft or diffused shadows to create depth, and use pops of color for signs, cars, or people to make the scene feel dynamic.

Tip: When tackling a new environment, spend time observing its unique textures, colors, and light effects. Take reference photos, if possible, and make quick sketches to familiarize yourself with its distinctive features.


4. Essential Techniques and Tips for Success

– Layering: Building up layers adds depth and complexity to a painting. Start with broad strokes to block in major elements, then add layers of details as you move forward. This approach helps create a sense of distance and fullness in the scene.

– Color Mixing and Harmony: Nature is rarely made up of pure colors. Practice blending to achieve naturalistic tones and ensure harmony across your palette. Using complementary colors sparingly can also make certain elements pop without overwhelming the scene.

– Brush Techniques: Different brush strokes can create varied textures, like rough stippling for trees, sweeping strokes for skies, or dabbing for rocks. Experiment with brush sizes and shapes to achieve the textures that best suit each part of your landscape.

– Observation and Patience: The more you observe real landscapes, the more natural your paintings will feel. Study photographs or spend time outdoors to observe color shifts, light patterns, and atmospheric effects in real time.

Tip: Don’t rush the process—landscape painting often requires patience to capture details and build layers. Give yourself time to adjust and refine your work as the painting unfolds.


Conclusion

Landscape painting offers a rewarding way to connect with nature and express its beauty on canvas. By focusing on perspective, atmospheric effects, and environment-specific techniques, you can bring your landscapes to life with depth and authenticity. With practice and attention to detail, your landscapes will become windows into the natural world, inviting viewers to explore and feel the unique atmosphere of each scene. So grab your brushes, step outside, and start capturing the world around you—one stroke at a time.

At Hodis Learning & Music, we believe that every artist can develop their unique style with the right guidance and practice. Our art lessons cover landscape painting, perspective, color theory, and much more, designed for artists of all ages and skill levels. Whether you’re just starting out or looking to refine your technique, our experienced instructors are here to help you bring your creative vision to life. Call or email us today to get started.

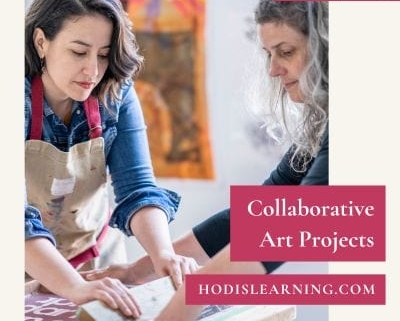
Collaborative Art Projects

In the art world, collaboration is more than just working together—it’s a transformative process that can elevate creative ideas to new heights. We’re reviewing the benefits of collaboration in art, highlighting successful examples, and sharing advice on how artists can find and work effectively with collaborators.


The Value of Collaboration in Art

Artistic collaboration brings together diverse skills, ideas, and experiences, leading to outcomes that often go beyond what any single artist could achieve alone. Collaboration encourages artists to:

  1. Expand Their Skill Set: Working with others offers the chance to learn new techniques, mediums, or tools.
  2. Push Creative Boundaries: Collaborating partners challenge each other to think outside the box, often resulting in groundbreaking work.
  3. Gain a New Perspective: Sharing ideas fosters empathy and understanding, enriching the creative process.
  4. Build Lasting Connections: Art is a deeply personal experience, and creating together can form strong, meaningful connections with like-minded creatives.


Showcasing Successful Collaborative Art Projects

Collaboration in art has a rich history, with many well-known artists producing iconic pieces through creative partnerships. Here are a few examples:

1. Jean-Michel Basquiat and Andy Warhol

This unlikely duo from the 1980s combined Warhol’s pop art style with Basquiat’s graffiti-inspired aesthetic to create pieces that challenged conventional art forms. Their work is a testament to the power of merging different artistic voices.

2. Christo and Jeanne-Claude

Known for their large-scale environmental installations, such as “The Gates” in Central Park, the husband-and-wife team transformed landscapes into immersive, transformative experiences. Their collaboration exemplifies how two people can share a singular vision and bring it to life on a monumental scale.

3. Gorillaz Music and Visual Art Collaboration

This virtual band combines music, digital animation, and visual art, demonstrating how cross-disciplinary collaboration can create an innovative art form. Musicians, animators, and visual artists work together to build an immersive, multimedia experience for fans.


How to Find the Right Collaborator

For artists interested in collaborative work, finding the right partner is essential. Here are some tips for identifying and connecting with potential collaborators:

  1. Know Your Own Artistic Goals: Before reaching out, have a clear sense of what you want to accomplish. This clarity will help you identify a collaborator whose vision aligns with yours.
  2. Seek Out Artists with Complementary Skills: Think about what your project needs—perhaps a muralist could use the skills of a digital artist, or a photographer might want to work with a graphic designer. Complementary skills can enrich the final result.
  3. Join Local Art Communities and Online Platforms: Community art centers, art schools, and online platforms like Behance and Instagram can be great places to connect with like-minded artists. Many online art communities allow artists to showcase work and find potential collaborators with similar interests.
  4. Attend Art Events and Exhibitions: In-person connections can be powerful, and attending events in your local area or online art fairs can open doors to meeting artists with similar aspirations.


Tips for a Successful Collaborative Experience

Collaborative projects can be incredibly rewarding but require open communication and flexibility. Here’s how to make sure the process goes smoothly:

  1. Set Clear Roles and Expectations: Decide who is responsible for what, and establish a timeline for completing each part of the project. Clear roles prevent confusion and help keep everyone accountable.
  2. Communicate Regularly and Honestly: Discuss ideas openly, give and receive constructive feedback, and keep each other updated on progress. Communication builds trust and keeps the project on track.
  3. Embrace Compromise: Collaboration means finding middle ground. Be open to feedback and flexible with your ideas—compromise often leads to more innovative outcomes.
  4. Celebrate Each Step: Acknowledge milestones along the way and celebrate each phase of the creative journey. Small celebrations keep the team motivated and engaged.


Conclusion

Collaboration in art unlocks opportunities for growth, innovation, and creative exploration that solo projects often cannot achieve. At Hodis Learning & Music, we are passionate about fostering collaborative learning environments where our students can connect, share, and inspire each other. We encourage you to seek out opportunities for creative collaboration and experience the unique magic of working alongside others. Whether you’re a seasoned artist or just starting out, there’s a world of potential waiting to be discovered when artists come together. Call or email us today to get started.

The Evolution Of Musical Instruments

Music has been an integral part of human culture for thousands of years, with musical instruments playing a crucial role in its development. The evolution of musical instruments reflects the ingenuity and creativity of humans as they sought to express themselves through sound. From rudimentary tools to sophisticated digital devices, the journey of musical instruments is a fascinating story of innovation and cultural exchange. Here’s a look at the evolution of musical instruments and their impact on music and society.


Early Beginnings

The earliest musical instruments were likely objects like sticks, stones, and animal bones and used to create rhythm and percussive sounds. Archaeological discoveries suggest that the first known musical instrument is the bone flute, dating back over 40,000 years. These primitive instruments were used in rituals and social gatherings, laying the foundation for the diverse world of music we know today.


Ancient Civilizations

As civilizations developed, so did the complexity of their musical instruments. Ancient Egyptians, Greeks, and Mesopotamians crafted instruments that were more sophisticated and varied. The Egyptians used harps, flutes, and percussion instruments in their religious ceremonies, while the Greeks developed the lyre and the kithara, predecessors to modern stringed instruments. The Greeks also introduced theoretical foundations for music, influencing Western musical thought for centuries.


The Middle Ages and Renaissance

The Middle Ages saw the rise of the medieval lute, the ancestor of the modern guitar, and the development of early keyboard instruments like the clavichord and harpsichord. Music became more structured, with the Church playing a significant role in its dissemination and performance. During the Renaissance, the invention of the printing press revolutionized music by allowing for the wide distribution of musical scores, making music more accessible to the public.


The Baroque and Classical Periods

The Baroque period (1600-1750) brought about significant advancements in instrument design and construction. The violin family, including the viola, cello, and double bass, became prominent, and the development of the modern orchestra began. The harpsichord was replaced by the pianoforte (piano), which allowed for greater dynamic expression in music.

During the Classical period (1750-1820), composers like Mozart and Beethoven pushed the boundaries of musical composition, leading to further refinements in instrument design. The piano became the centerpiece of the musical world, and woodwind instruments like the clarinet and flute saw significant improvements.


The Romantic Period

The Romantic period (1820-1900) was characterized by emotional expression and expanded orchestras. Instrument makers experimented with new materials and technologies, leading to the development of valves for brass instruments and the Boehm system for woodwinds, which improved their playability and range. This period also saw the rise of virtuoso performers who showcased the technical capabilities of their instruments.


The 20th Century and Beyond

The 20th century witnessed a dramatic transformation in musical instruments with the advent of electronic technology. The invention of the theremin, synthesizer, and electric guitar opened new avenues for musical exploration. Digital technology further revolutionized music production, allowing for the creation of complex sounds and compositions through computer software.


Takeaways

The evolution of musical instruments is a testament to human creativity and the desire to push the boundaries of artistic expression. From ancient bone flutes to modern synthesizers, each advancement has contributed to the rich tapestry of music. For students newly discovering music, exploring the history of musical instruments can provide valuable insights into the interplay between culture, technology, and art. Encouraging students to learn about and experiment with different instruments can deepen their appreciation for music and inspire their own creative journeys.

Hodis Learning & Music’s expert music teachers each teach several instruments, which offers students various approaches to music through different instruments and their respective traditions. Learn more about our music lessons program by calling or emailing us today!

Homeschooling on a Budget

Homeschooling offers flexibility and customization, allowing parents to tailor education to their children’s needs and interests. However, one concern many families face is the cost of teaching resources and materials. While homeschooling can be more affordable than private schooling, it requires careful planning to avoid overspending. Here’s a guide to homeschooling on a budget, where we highlight affordable teaching resources and materials that won’t break the bank.


Use Free Online Resources

The internet is a treasure trove of free educational materials for homeschooling. Websites like Khan Academy, Coursera, and edX offer a wide range of free courses and lessons on subjects from math and science to history and literature. Additionally, platforms like YouTube host educational channels with high-quality content that can supplement your curriculum. Consider using these resources to diversify your teaching materials without spending a dime.


Leverage Public Libraries

Public libraries are an invaluable resource for homeschooling families on a budget. They offer free access to books, audiobooks, DVDs, and online resources. Many libraries also provide educational programs and workshops for children, allowing them to engage in group learning activities at no cost. Visit your local library to explore their homeschool-friendly resources and take advantage of what they offer.


Share and Swap Materials

Homeschooling communities are often tight-knit and supportive. Consider joining local homeschool groups or online forums where you can connect with other homeschooling parents. These communities often organize material swaps, where families can exchange textbooks, workbooks, and other teaching aids. By participating in these swaps, you can acquire new materials without spending extra money.


Embrace Open-Source Curriculum

Open-source curriculum is a budget-friendly option for homeschooling families. Open Educational Resources (OER) are freely available teaching materials that can be customized to fit your curriculum. Websites like OpenStax and OER Commons offer free textbooks, lesson plans, and educational tools that can help you create a comprehensive homeschool program without the high costs of traditional textbooks.


Use Everyday Objects for Learning

Learning doesn’t always require expensive materials. Everyday objects can be transformed into educational tools with a little creativity. For example, measuring cups and spoons can teach math concepts, while common items you might find in your backyard, like leaves, rocks, and shells, can be used for science experiments. Encourage hands-on learning by incorporating these items into your lessons, making education engaging and budget-friendly.

Opt for Digital Resources

Digital resources can be a cost-effective alternative to traditional textbooks. E-books and printable worksheets are often cheaper than physical copies, and they offer the added benefit of being easily shared among multiple children. Additionally, many digital resources are customizable, allowing you to tailor the content to your child’s learning style and pace.


Take Advantage of Free Community Events

Local community events can provide valuable learning experiences for homeschoolers. Keep an eye on free workshops, museum days, nature walks, and other educational activities in your area. These events offer opportunities for socialization and hands-on learning without the need for costly field trips or specialized programs.

By utilizing these affordable teaching resources and materials, you can create a rich and engaging homeschooling experience without overspending. Homeschooling on a budget is possible with creativity, resourcefulness, and a willingness to explore the many free and low-cost options available.


Hire Professionals for Your Homeschooling Needs

Hodis Learning & Music’s expert homeschool education program takes the pressure off parents by managing and delivering every aspect of the homeschool process. Learn more by calling us or submit a form today!

Musical Performance Tips: Overcoming Stage Fright and Nerves

Performing music can be a thrilling experience, but for many, it also comes with a dose of anxiety. Stage fright and nerves can affect musicians of all ages and skill levels, but with the right strategies, you can overcome these challenges and deliver a confident performance. Whether you’re preparing for a recital, concert, or just want to feel more at ease while playing for others, these tips can help you manage your nerves and shine on stage.

1. Practice, Practice, Practice

One of the most effective ways to combat stage fright is to be well-prepared. Practice your music until you feel confident in your abilities. Knowing your material inside and out can help calm your nerves and boost your confidence.


2. Visualize Success

Take some time before your performance to visualize yourself performing confidently and flawlessly. Imagine the audience applauding and feeling proud of your performance. This positive visualization can help build your confidence and reduce anxiety.


3. Focus on the Music

Instead of worrying about how you’re being perceived, focus your attention on the music itself. Get lost in the melodies, rhythms, and emotions of the piece. This can help shift your focus away from your nerves and onto the beauty of the music.


4. Control Your Breathing

Deep, slow breathing can help calm your nerves and reduce anxiety. Practice deep breathing exercises before going on stage, and take deep breaths if you start to feel nervous during your performance.


5. Stay Positive

Replace negative thoughts with positive affirmations. Remind yourself that it’s natural to feel nervous before a performance and that you have prepared well. Focus on the excitement of sharing your music with others rather than on your fears.


6. Warm Up Beforehand

Just as athletes warm up before a game, musicians should warm up before a performance. Spend some time practicing scales or other warm-up exercises to get your fingers (or voice) moving and to calm your nerves.


7. Embrace Mistakes

Remember that mistakes happen to everyone, even seasoned performers. If you make a mistake during your performance, try to stay calm and continue playing. Most of the time, the audience won’t even notice, and even if they do, they will appreciate your professionalism in carrying on.


8. Connect with Your Audience

Instead of viewing the audience as intimidating judges, think of them as friends who are eager to hear your music. Make eye contact, smile, and let your passion for the music shine through. This connection can help you feel more relaxed and engaged during your performance.


Music Lessons with Hodis Learning & Music

Ready to conquer stage fright and become the confident musician you’ve always wanted to be? Join us at Hodis Learning & Music for expert music lessons tailored to your needs. Call or email us today to get started.

Funding and Grants for Artists

Whether you’re a painter, sculptor, photographer, or multidisciplinary artist, securing funding and opportunities for artistic growth can be critical to advancing your career. Grants, residencies, and fellowships offer financial support, creative time, and valuable networking opportunities. But how do you find the right ones, and how can you stand out in a sea of applicants? We’ll walk you through the steps to finding and applying for art grants, residencies, and fellowships and share tips for writing compelling applications.


1. Finding the Right Opportunities

The first step is to discover the opportunities that match your artistic practice, career goals, and location. Here’s where to look:

Online Databases and Art Platforms

– Websites like Res Artis, TransArtists, and Alliance of Artists Communities are great for finding residencies.
– Platforms like Creative Capital, ArtDeadline.com, and NYFA Source list grants and fellowships.
– Local arts councils often offer grants to artists based in specific regions.

Networking and Social Media

– Follow artists, organizations, and curators on platforms like Instagram. Artists frequently share upcoming opportunities.
– Join online artist groups on Facebook or LinkedIn, where members often post residency or grant opportunities.

Newsletters and Mailing Lists

– Sign up for newsletters from arts organizations, galleries, and foundations. Many grants and residencies are announced directly through these channels.


2. Understanding the Types of Support

It’s important to know what you’re applying for and how it aligns with your current needs:

Art Grants

Grants are typically financial awards that don’t require repayment. They can cover costs like project development, exhibitions, or personal artist growth. Look for grants that focus on your medium, your geographic location, or your demographic (e.g., emerging artists, women, LGBTQ+).

Residencies

Residencies offer time and space to create art, often providing studios, housing, and stipends. They’re ideal if you’re seeking a period of uninterrupted work or want to immerse yourself in a new environment. Some residencies may require you to engage with the local community through workshops or exhibitions.

Fellowships

Fellowships are typically longer-term programs that provide financial support and mentorship. They’re often highly competitive and prestigious, helping to elevate your career. Fellowships may require a body of work to be completed during the program or have a research-based component.


3. Preparing Your Application

Once you’ve identified the right opportunities, it’s time to prepare your application. While each grant, residency, or fellowship will have specific guidelines, certain elements are almost always required.

Artist Statement

Your artist statement should clearly define your artistic practice, philosophy, and goals. Keep it concise—no more than 300 words. Tailor your statement to align with the values and mission of the grant or residency you’re applying to. This shows the selection committee that you’ve done your research and understand how your work fits into their vision.

Project Proposal for Grants

For grants, you’ll likely need to submit a proposal that outlines the project you plan to complete if awarded the funding. Be specific. Include details about the medium you’ll be working in, the themes you’ll explore, and how the grant will help you achieve your artistic goals. Ensure your proposal is realistic within the grant’s budget and timeline.

Portfolio of Work

Your portfolio is the heart of your application. Include a carefully curated selection of your best and most recent work—usually 8 to 15 pieces. Make sure each piece has a high-quality image and includes a brief description, including the medium, dimensions, and any relevant background information. Tailor the portfolio to the grant or residency focus, emphasizing the works most in line with their mission.

Letters of Recommendation for Fellowships

Some fellowships require letters of recommendation. Reach out to mentors, professors, or peers who are familiar with your work and can speak to your talent and potential. Provide them with plenty of notice and a summary of the fellowship, so they can tailor their letters accordingly.


4. Tips for Writing a Compelling Application

Start Early

Give yourself plenty of time to complete the application. Start well before the deadline to avoid last-minute stress and allow time for revision. A rushed application can result in small mistakes or unclear ideas.

Follow the Guidelines

Carefully read the application instructions. Failing to follow guidelines can disqualify you immediately, no matter how strong your application is. Pay attention to word counts, formatting requirements, and deadlines.

Be Authentic

Your application should reflect who you are as an artist. Don’t try to mold your work to fit the perceived expectations of the selection committee. Authenticity can set you apart from other applicants.

Tell a Story

When writing your project proposal or artist statement, think of it as storytelling. Explain not just what you’re doing, but *why* you’re doing it. What drives your art? What impact do you hope to have? A compelling narrative can make your application more memorable.

Demonstrate Impact

Especially for grants, it’s crucial to demonstrate the potential impact of your project. Explain how the funding will enable you to complete work that could have a wider cultural or community effect. If applicable, mention how you’ll share the results (e.g., through exhibitions, publications, or community engagement).

Finding and applying for art grants, residencies, and fellowships can be a game-changer for your career. While the process may seem daunting, taking the time to craft a thoughtful and compelling application can increase your chances of success.

Ready to Take Your Art to the Next Level?

Whether you’re applying for grants or just looking to sharpen your skills, having the right guidance can make all the difference. At Hodis Learning & Music, we offer personalized one-on-one art lessons tailored to your creative goals. From building a professional portfolio to refining your technique, we’re here to support you on your artistic journey. Call us or submit a form to begin music lessons today.