4th year Anniversary for Hodis Learning and Music

Last week, Hodis Learning & Music celebrated four years of business! I am so proud of how much our team has accomplished since our third anniversary.

Upholding a Tradition of Excellent Service and Giving Back

Four years ago, my team and I developed Hodis Learning & Music upon a philosophy of kindness and expertise. Every decision that our company has made has stemmed from and further promoted this philosophy. Our tradition of excellent service is strong and spreading throughout the Pasadena area. Check out how far we’ve come since our first business anniversary!

We have continued our philanthropic endeavors. We believe strongly in giving back to the educational systems that our students go through to enrich their education. As such, we have continued to give 20% of our profits to SPEF and PEF.


Our Expert Educators

Our expert tutors, music teachers, and art instructors are the backbone of our company. Our team of exceptional educators have helped give us a reputation of excellence and reliability in the community, and we are indebted to all of their hard work. Further, our team has grown substantially over the past year, helping to expand the number of subjects offered so we can serve more students in their academicmusicalartistic, and homeschool endeavors.


Trusted Collaborators

We are grateful for our trusted collaborators. Namely, we thank Nexusplex Business Production Agency and The South Pasadenan News for their help in building and advertising our company. Additionally, we are grateful for the partnership of SPEF and PEF, who have helped us to make a bigger impact on our community. Finally, we are grateful for the partnership of local school districts and organizations who have given us the opportunity to serve students in need.


Thank YOU!

Hodis Learning & Music would not be where it is today without our loyal clients and dedicated community of supporters. We are grateful for your business throughout the past three years. My staff and I look forward to continuing to serve you and our beautiful community in the coming years.


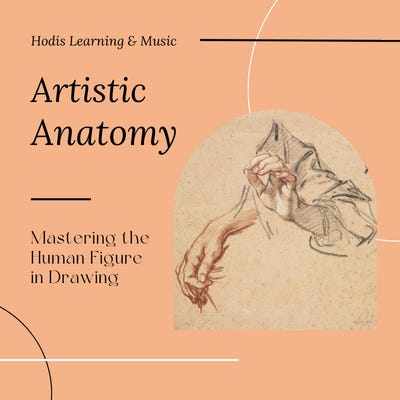
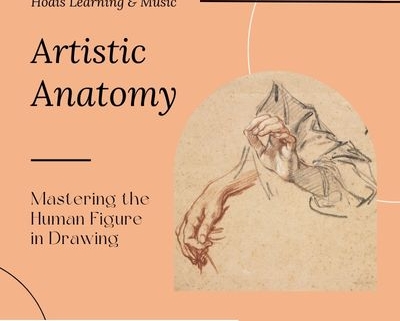
Artistic Anatomy

Drawing the human figure is a challenging yet rewarding endeavor for artists of all levels. In this blog post, we’ll explore the importance of mastering the human figure in drawing.

The Importance of Studying Human Anatomy

The human body is complex and intricate, making it a fascinating subject for artists. By studying human anatomy, artists gain a deeper understanding of the structure and proportions of the body, allowing them to create more realistic and lifelike drawings. Understanding the underlying bones, muscles, and tissues enables artists to depict the human figure with accuracy and confidence.

Mastering the human figure in drawing not only improves the technical skills of an artist but also enhances their ability to express emotions and tell stories through their art. The human body is capable of a wide range of movements and poses, each conveying a different message or feeling. By mastering the human figure, artists can create dynamic and engaging compositions that resonate with their audience.


Start with the Basics

Begin by studying the basic structures of the human body, such as the skeletal system and major muscle groups. Understanding these foundational elements will provide a solid framework for more advanced studies.


Use Reference Materials

Utilize anatomy books, online resources, and reference images of the human body to study its proportions, shapes, and forms. Observing and understanding how the body moves and functions will enhance your ability to draw it accurately.


Practice Regularly

Like any skill, learning artistic anatomy requires regular practice. Set aside time each day to sketch and study the human figure. Start with simple gestures and gradually progress to more detailed studies.


Attend Live Drawing Classes

These drawing classes provide an excellent opportunity to practice drawing from a live model. You will develop your observational skills and understand how the body moves and poses in real life.


Focus on Specific Areas

Pay attention to areas of the body that are challenging for you. Whether it’s hands, feet, or facial features, dedicating extra time to these areas will help you improve your overall understanding of anatomy.


Get Started

Mastering the human figure in drawing is a valuable skill for any artist. At Hodis Learning & Music, we offer art lessons that provide aspiring artists with the knowledge and skills they need to succeed. Unlock your full creative potential by calling or emailing us today.

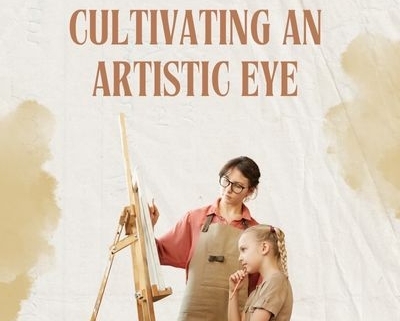
Cultivating an Artistic Eye

Great artists see the world differently. They notice the interaction between light and shadow, the subtleties of color, and the shapes hidden in everyday objects. Developing this “artistic eye” is not just about creating better art, it’s about appreciating the beauty in the world around you. Looking to sharpen your artistic perception and gain an artist’s eye? Read on to discover how.


1. Train Your Eye to See Shapes

Everything around us is made up of basic shapes like circles, squares, and triangles. Finding these shapes and learning how  to break down complex objects into their simplest forms can help you better understand proportions and composition.

Exercise:

  • Choose an everyday object, like a mug or a plant. Sketch it quickly using only basic shapes. For example, you might draw a mug as a cylinder with a rectangular handle. Add more details gradually to transform the shapes into a more realistic representation.


2. Observe Light and Shadow

Shadows and highlights are crucial for adding depth and dimension to art. But first, you need to understand how light interacts with surfaces.

Exercise:

  • Place an object like a cup or a piece of fruit under a single light source. Observe the shadows it casts and the way light creates gradients on its surface.
  • Try sketching the object, focusing on the shadows and highlights rather than the object’s outline. Use shading techniques like cross-hatching or blending to mimic the light effects.


3. Focus on Colors in Everyday Life

Colors are rarely as simple as they seem. Part of having an artistic eye is identifying the variations and gradients within a color. A green leaf might contain hints of yellow, blue, or even purple, depending on the light and its surroundings.

Exercise:

  • Spend time observing the colors around you. Look for unexpected hues in familiar objects, like the reddish tones in shadows or the various shades and colors within a patch of grass.
  • Use a sketchbook to create a color wheel based on what you see. Mix paints or layer colored pencils to match the real-life colors.


4. Practice Gesture Drawing

Gesture drawing is a quick and loose sketching technique that captures the essence of a subject’s movement or form. It’s particularly useful for understanding proportions, movement, and flow.

Exercise:

  • Set a timer for 30 seconds to 2 minutes. Sketch a person, animal, or object in motion, focusing on the overall form and energy rather than details.
  • Repeat this with different subjects to develop your ability to quickly capture what you observe around you.


5. Keep a Daily Observation Journal

Make observation a daily habit. Keep a sketchbook or journal on hand to document things that catch your eye as you develop your artistic observation skills.

Exercise:

  • Dedicate a few minutes each day to drawing or writing about something you observed. Maybe you noticed the way the afternoon light filtered through the leaves on a tree or the geometric patterns on a building.
  • Reflect on what makes these details stand out and how you might incorporate them into your art.

6. Slow Down and Be Present

In today’s fast-paced world, it’s easy to overlook the beauty around us. Cultivating an artistic eye requires mindfulness and patience.

Exercise:

  • Spend time in a park, a museum, or a busy coffee shop. Challenge yourself to notice something new every five minutes—a unique color combination, an interesting shadow, or a striking texture. Sketch or jot down your observations to reinforce your discoveries.


Final Thoughts

Developing an artistic eye is a journey that takes time and practice. As you consistently complete the exercises above, you’ll not only improve your artistic skills but also gain a new perspective on the world. Remember, art is as much about seeing as it is about creating.

Whether you’re just starting or looking to refine your skills, our private art lessons provide personalized guidance to help you develop your artistic talents.. Call or email us to learn more or book your first session.

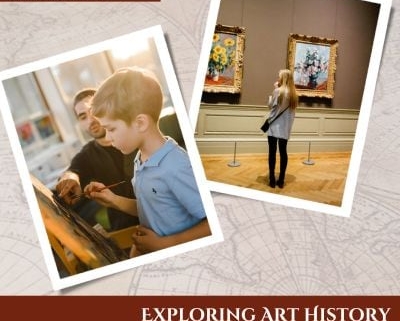
Exploring Art History Through Lessons

Art history is a fascinating subject that tells the story of human creativity across cultures and centuries. By incorporating art history into art lessons, students not only learn the techniques and skills needed to create their own masterpieces but also gain a deeper understanding of the world around them, and the state of art today.


Bringing Techniques to Life with Historical Context

Art history provides a helpful backdrop for understanding artistic techniques. Learning about the Impressionists, for example, reveals why artists like Monet and Renoir experimented with light and color in new ways. Studying Cubism with its bold lines and shapes helps students see how Picasso and Braque challenged convention. By introducing art movements alongside hands-on projects, students gain insight into the “why” behind the methods they’re learning.

  • Lesson Idea: Pair a discussion about Renaissance frescoes with a fun experiment using plaster and paint to mimic the fresco technique.
  • Learning Outcome: Students learn about materials and the processes used to create the masterpieces we still admire today.


Inspiring Creativity through Famous Artworks

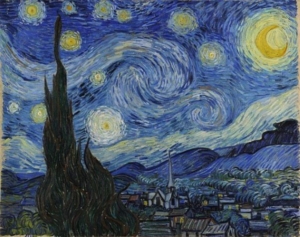
Famous artworks are more than just beautiful; they can give us clues about the artist, their motivations, and the time they lived in. Discussing the stories behind iconic pieces like van Gogh’s Starry Night gives students a more complete sense of the art and its impact. These stories can inspire students to embrace their own unique perspectives and learn how to create art that reflects them.

Encourage students to analyze these works, asking questions like: 

  • What emotions do you feel looking at this artwork?
  • What might the artist have been thinking or feeling?
  • How would you add emotion to your art?


Exploring Art Styles across Cultures

Art history is also helpful for exploring different cultures. Students can delve into the vibrant patterns of African textiles, the intricate details of Islamic calligraphy, or the serene landscapes of Japanese ukiyo-e prints. By learning about art forms from around the globe, students develop an understanding of the history of different cultures and how geography, major events, and values impacted art, from the materials used to the subject of the works created.

  • Lesson Idea: Learn about Navajo sandpaintings, discuss their cultural significance, and observe common symbols in Navajo art. Encourage students to think about what symbols they might use to represent their own values or experiences. Then, using colored sand, powdered chalk, or dyed salt, have students sketch a simple design on sturdy paper or canvas. Using glue, students can carefully apply sand to bring their designs to life. This lesson is meant to be inspired by, not a replication of, ceremonial practices. Emphasize respect for the sacred nature of the traditional art form.
  • Learning Outcome: Students explore the connection between art and culture, learn about Navajo traditions, and create symbolic artwork.


Connecting Art and History to Today

Art history lessons provide a foundation for understanding modern art and design. Students can trace the evolution of styles, seeing how the past influences contemporary creations. This connection helps young artists understand that their work is part of an ongoing narrative, inspiring them to contribute their voices to the ever-growing world of art. 

Why Choose Hodis Learning & Music?

At Hodis Learning & Music, we’re passionate about making art history an engaging and enriching part of art instruction. Our tailored art lessons can integrate historical context along with practical techniques and creative exploration. Call or email us today to learn more about our art lessons.

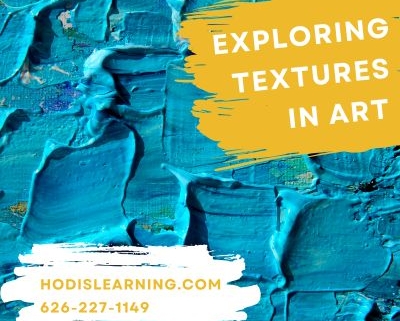
Exploring Textures in Art

Texture plays a vital role in art, bringing life and dimension to an otherwise flat surface. Artists can create textures that are rough, smooth, soft, or even illusionary, adding richness and complexity to their work. In this post, we’ll explore how artists can incorporate and replicate textures in their art using techniques that apply to both painting and drawing. Whether you’re aiming to capture the softness of fur, the roughness of bark, or the smoothness of glass, these tips will guide you on how to achieve realistic, expressive textures.


1. Understanding Texture: Why It Matters

Texture in art can be tactile, a real, physical texture you can feel, or visual, the illusion of texture created on a flat surface. Both types of texture help create depth, engage the viewer’s senses, and bring the subject to life. Texture adds character and can evoke emotions, encouraging the viewer to connect with the piece on a sensory level.

When artists add texture, they’re not just reproducing the look of an object—they’re also adding narrative elements, guiding viewers through an experience with the subject.


2. Techniques for Creating Texture in Painting

Painting offers endless possibilities for creating a variety of textures. Here are some versatile techniques to get started:

– Impasto: Impasto is a technique where paint is applied thickly, creating raised, three-dimensional areas on the canvas. This technique is great for adding texture to objects like rocks, leaves, or clouds. Use a palette knife or a thick brush to layer the paint heavily and build up a physical texture.

– Dry Brushing: To create a rough or grainy texture, use a dry brush with very little paint on it. Lightly drag it across the surface for a broken, textured effect that’s ideal for surfaces like wood, hair, or fabric. Varying the angle and pressure will give even more depth to the effect.

– Sponging and Dabbing: Sponges, paper towels, or even crumpled plastic wrap can be dabbed or pressed into wet paint to create organic, unpredictable textures. This method works especially well for natural elements like leaves, rocks, and mossy surfaces.

– Scumbling: Scumbling involves lightly dragging a dry brush with paint over a painted surface to create a translucent layer. This technique is useful for soft textures, such as clouds, mist, or fabric folds, as it gives a hazy, subtle effect.

Tip: Experiment with various tools like combs, toothbrushes, or even your fingers. Each tool creates unique textures and adds variety to your painting.


3. Techniques for Creating Texture in Drawing

In drawing, texture is created through line work, shading, and pattern. Here are several techniques to try:

– Hatching and Cross-Hatching: These are among the most commonly used methods for adding texture. Hatching involves drawing parallel lines, while cross-hatching layers lines at different angles. This technique can convey rough textures like woven fabric, rough paper, or the skin of certain fruits.

– Stippling: Stippling uses small dots to create texture and shading. Closer, denser dots create darker tones and rough textures, while spaced-out dots make the texture appear lighter and softer. Stippling is time-intensive but is highly effective for natural textures, such as sand or stone.

– Blending and Smudging: Blending pencils or charcoal with tools like tortillons (blending stumps) or even your finger can create smooth, soft textures, perfect for things like skin, cloth, or glass. Experiment with different pressures to vary the effect.

– Sgraffito: This technique involves scratching away a layer to reveal what’s underneath. To use sgraffito in pencil drawing, you can shade an area densely and then use an eraser or a sharp point to scratch in details, like the veins in leaves or fur texture.

Tip: Explore the texture of different papers as well. Rougher paper enhances the effect of pencil strokes, creating a more tactile feel.


4. Combining Techniques to Create Realistic Textures

– Skin and Fur: Begin with a base layer of blending to capture the smoothness of skin or the density of fur, then add details using cross-hatching or fine lines to mimic pores, wrinkles, or individual hairs.

– Water and Reflections: Start with a smooth base, using blending or wet-on-wet painting to capture water’s fluid quality. Then, add ripples, highlights, or reflections with light, broken brushstrokes or eraser marks for realism.

– Stone and Brick: Use sponging or stippling to create an irregular surface, then add details like cracks or rough edges with fine hatching or dry brushing to capture the gritty surface of stone or brick.

Tip: To fully develop these textures, observe your subject carefully. Study how light interacts with the texture, as this can make all the difference in creating realism.


5. Tips for Applying Texture Thoughtfully

– Emphasize Key Areas: Use more texture in focal areas where you want to draw the viewer’s attention, and keep the background or less important elements smoother or simpler.

– Create Contrast: Combining rough and smooth textures adds visual contrast and interest. For example, place a rough, impasto texture next to a smooth, blended area to emphasize both textures.

– Practice Observation: Study textures around you—brick walls, tree bark, fabric, glass surfaces—and try replicating them in small sketches or swatches to get comfortable with the techniques.

– Balance Detail and Simplicity: Use texture in moderation. Sometimes, less is more when it comes to adding texture to a piece. Decide on the purpose of each texture and keep it cohesive with the overall piece.


Conclusion

Textures give life, depth, and realism to artworks, bridging the gap between a two-dimensional surface and the rich sensory world we experience. By experimenting with these techniques, artists can capture the essence of their subjects, whether they’re aiming to depict the delicate softness of a petal or the ruggedness of a mountain. So grab your tools, experiment, and let texture bring new dimensions to your art!


Discover Your Unique Style with Hodis Learning & Music

At Hodis Learning & Music, we offer art lessons that cover a wide range of techniques, including creating realistic and expressive textures. Our experienced instructors work with students at all skill levels, helping them to discover and refine their unique style. Whether you’re interested in drawing, painting, or exploring other mediums, we’re here to support your creative journey. Call or email us today to learn more and start bringing texture and life to your art!

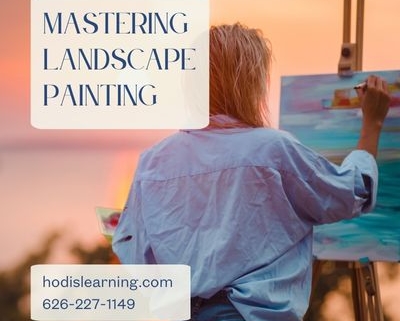
Mastering Landscape Painting

Landscape painting invites artists to explore the beauty of the natural world, capturing its colors, shapes, and emotions on canvas. Whether you’re painting a tranquil forest, a dramatic mountain range, or a bustling urban park, understanding the foundational techniques of landscape painting is essential to capturing each scene’s unique character. In this guide, we’ll explore essential techniques and tips for painting landscapes, focusing on perspective, atmospheric effects, and the nuances of different environments.


1. The Importance of Perspective in Landscape Painting

Perspective is one of the most crucial techniques in landscape painting, as it adds depth and realism to a flat surface. There are two main types to consider: linear perspective and aerial perspective.

Linear Perspective: Linear perspective uses converging lines to create the illusion of depth. To achieve this, identify a horizon line and establish one or more vanishing points—points where parallel lines converge. This technique helps to create a sense of distance and structure, particularly in landscapes with paths, roads, or architectural elements.

Aerial (or Atmospheric) Perspective: Aerial perspective relies on color and value to create depth. Objects in the foreground are typically painted with sharper, warmer tones, while those in the background appear lighter, cooler, and slightly blurred. This gradual change in color and detail mimics how the human eye perceives distance and enhances the three-dimensionality of your landscape.

Tip: When starting your painting, sketch the horizon line and place a few basic elements in the foreground, midground, and background to help establish a solid foundation for perspective.


2. Creating Atmospheric Effects

Atmospheric effects, such as light, weather, and time of day, add a dynamic quality to landscapes. Mastering these elements brings life and movement to your work, conveying a specific mood or feeling.

– Light and Shadow: Light changes throughout the day, affecting colors and contrast. Observe how light behaves at different times—soft and warm at sunrise, harsh and bright at midday, or muted and golden at dusk. Use a range of tones to capture the direction and quality of light, and remember that shadows in nature aren’t just black or gray; they often carry hints of color from the surrounding environment.

– Weather Conditions: Weather adds variety to landscapes. For a rainy scene, consider using muted colors and softer brushstrokes to create a hazy effect. For a sunny day, use bright, warm colors and crisp edges. For foggy scenes, keep distant elements indistinct, blending colors to capture the softening effect of mist.

– Seasonal Changes: Each season offers unique color palettes and textures. Spring landscapes may be rich in greens and pastels, while autumn scenes feature warmer, earthy tones. Adjusting your palette and brush techniques to reflect the season helps capture the essence of each setting.

Tip: Experiment with transparent layers (glazing) to capture the subtle shifts in light and atmosphere. Thin washes of color can help you build realistic transitions and make the scene appear more natural.


3. Capturing the Essence of Different Environments

Each type of landscape, from forests to coastal cliffs, has distinct characteristics. Understanding these can help you authentically capture the essence of each environment.

– Forests and Woodlands: Forests often feature overlapping layers of trees and foliage. To paint them realistically, focus on building texture and depth. Use a mix of short, textured brushstrokes for leaves and branches, and vary the green tones to reflect the light filtering through the canopy. Forest floors may have scattered leaves, rocks, or moss, which can be painted with small, detailed strokes for added realism.

– Mountains and Cliffs: Mountains and rocky landscapes have strong, angular shapes. Use bold strokes and a limited color palette to create the rugged look of rocks and cliffs. Shadows play an essential role here, so pay attention to the direction of light and how it interacts with the irregular surfaces. Blending cool and warm grays can help capture the texture of stone.

– Water and Reflections: Painting water involves capturing its movement and reflections. For still water, use horizontal brushstrokes and focus on mirroring nearby elements. For waves or rivers, use varied, sweeping strokes to show the flow and add highlights to represent light hitting the water’s surface. Remember that reflections are softer and often slightly darker than the objects they mirror.

– Urban Landscapes: Urban landscapes require a mix of structured perspective and atmospheric effects. Start by establishing strong lines for buildings, roads, and other man-made structures. Add life with soft or diffused shadows to create depth, and use pops of color for signs, cars, or people to make the scene feel dynamic.

Tip: When tackling a new environment, spend time observing its unique textures, colors, and light effects. Take reference photos, if possible, and make quick sketches to familiarize yourself with its distinctive features.


4. Essential Techniques and Tips for Success

– Layering: Building up layers adds depth and complexity to a painting. Start with broad strokes to block in major elements, then add layers of details as you move forward. This approach helps create a sense of distance and fullness in the scene.

– Color Mixing and Harmony: Nature is rarely made up of pure colors. Practice blending to achieve naturalistic tones and ensure harmony across your palette. Using complementary colors sparingly can also make certain elements pop without overwhelming the scene.

– Brush Techniques: Different brush strokes can create varied textures, like rough stippling for trees, sweeping strokes for skies, or dabbing for rocks. Experiment with brush sizes and shapes to achieve the textures that best suit each part of your landscape.

– Observation and Patience: The more you observe real landscapes, the more natural your paintings will feel. Study photographs or spend time outdoors to observe color shifts, light patterns, and atmospheric effects in real time.

Tip: Don’t rush the process—landscape painting often requires patience to capture details and build layers. Give yourself time to adjust and refine your work as the painting unfolds.


Conclusion

Landscape painting offers a rewarding way to connect with nature and express its beauty on canvas. By focusing on perspective, atmospheric effects, and environment-specific techniques, you can bring your landscapes to life with depth and authenticity. With practice and attention to detail, your landscapes will become windows into the natural world, inviting viewers to explore and feel the unique atmosphere of each scene. So grab your brushes, step outside, and start capturing the world around you—one stroke at a time.

At Hodis Learning & Music, we believe that every artist can develop their unique style with the right guidance and practice. Our art lessons cover landscape painting, perspective, color theory, and much more, designed for artists of all ages and skill levels. Whether you’re just starting out or looking to refine your technique, our experienced instructors are here to help you bring your creative vision to life. Call or email us today to get started.

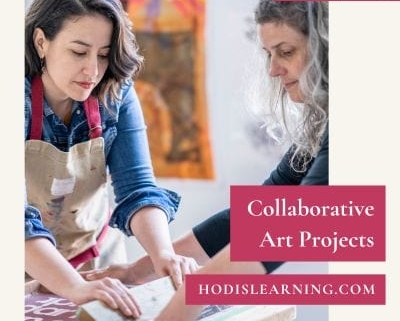
Collaborative Art Projects

In the art world, collaboration is more than just working together—it’s a transformative process that can elevate creative ideas to new heights. We’re reviewing the benefits of collaboration in art, highlighting successful examples, and sharing advice on how artists can find and work effectively with collaborators.


The Value of Collaboration in Art

Artistic collaboration brings together diverse skills, ideas, and experiences, leading to outcomes that often go beyond what any single artist could achieve alone. Collaboration encourages artists to:

  1. Expand Their Skill Set: Working with others offers the chance to learn new techniques, mediums, or tools.
  2. Push Creative Boundaries: Collaborating partners challenge each other to think outside the box, often resulting in groundbreaking work.
  3. Gain a New Perspective: Sharing ideas fosters empathy and understanding, enriching the creative process.
  4. Build Lasting Connections: Art is a deeply personal experience, and creating together can form strong, meaningful connections with like-minded creatives.


Showcasing Successful Collaborative Art Projects

Collaboration in art has a rich history, with many well-known artists producing iconic pieces through creative partnerships. Here are a few examples:

1. Jean-Michel Basquiat and Andy Warhol

This unlikely duo from the 1980s combined Warhol’s pop art style with Basquiat’s graffiti-inspired aesthetic to create pieces that challenged conventional art forms. Their work is a testament to the power of merging different artistic voices.

2. Christo and Jeanne-Claude

Known for their large-scale environmental installations, such as “The Gates” in Central Park, the husband-and-wife team transformed landscapes into immersive, transformative experiences. Their collaboration exemplifies how two people can share a singular vision and bring it to life on a monumental scale.

3. Gorillaz Music and Visual Art Collaboration

This virtual band combines music, digital animation, and visual art, demonstrating how cross-disciplinary collaboration can create an innovative art form. Musicians, animators, and visual artists work together to build an immersive, multimedia experience for fans.


How to Find the Right Collaborator

For artists interested in collaborative work, finding the right partner is essential. Here are some tips for identifying and connecting with potential collaborators:

  1. Know Your Own Artistic Goals: Before reaching out, have a clear sense of what you want to accomplish. This clarity will help you identify a collaborator whose vision aligns with yours.
  2. Seek Out Artists with Complementary Skills: Think about what your project needs—perhaps a muralist could use the skills of a digital artist, or a photographer might want to work with a graphic designer. Complementary skills can enrich the final result.
  3. Join Local Art Communities and Online Platforms: Community art centers, art schools, and online platforms like Behance and Instagram can be great places to connect with like-minded artists. Many online art communities allow artists to showcase work and find potential collaborators with similar interests.
  4. Attend Art Events and Exhibitions: In-person connections can be powerful, and attending events in your local area or online art fairs can open doors to meeting artists with similar aspirations.


Tips for a Successful Collaborative Experience

Collaborative projects can be incredibly rewarding but require open communication and flexibility. Here’s how to make sure the process goes smoothly:

  1. Set Clear Roles and Expectations: Decide who is responsible for what, and establish a timeline for completing each part of the project. Clear roles prevent confusion and help keep everyone accountable.
  2. Communicate Regularly and Honestly: Discuss ideas openly, give and receive constructive feedback, and keep each other updated on progress. Communication builds trust and keeps the project on track.
  3. Embrace Compromise: Collaboration means finding middle ground. Be open to feedback and flexible with your ideas—compromise often leads to more innovative outcomes.
  4. Celebrate Each Step: Acknowledge milestones along the way and celebrate each phase of the creative journey. Small celebrations keep the team motivated and engaged.


Conclusion

Collaboration in art unlocks opportunities for growth, innovation, and creative exploration that solo projects often cannot achieve. At Hodis Learning & Music, we are passionate about fostering collaborative learning environments where our students can connect, share, and inspire each other. We encourage you to seek out opportunities for creative collaboration and experience the unique magic of working alongside others. Whether you’re a seasoned artist or just starting out, there’s a world of potential waiting to be discovered when artists come together. Call or email us today to get started.

Funding and Grants for Artists

Whether you’re a painter, sculptor, photographer, or multidisciplinary artist, securing funding and opportunities for artistic growth can be critical to advancing your career. Grants, residencies, and fellowships offer financial support, creative time, and valuable networking opportunities. But how do you find the right ones, and how can you stand out in a sea of applicants? We’ll walk you through the steps to finding and applying for art grants, residencies, and fellowships and share tips for writing compelling applications.


1. Finding the Right Opportunities

The first step is to discover the opportunities that match your artistic practice, career goals, and location. Here’s where to look:

Online Databases and Art Platforms

– Websites like Res Artis, TransArtists, and Alliance of Artists Communities are great for finding residencies.
– Platforms like Creative Capital, ArtDeadline.com, and NYFA Source list grants and fellowships.
– Local arts councils often offer grants to artists based in specific regions.

Networking and Social Media

– Follow artists, organizations, and curators on platforms like Instagram. Artists frequently share upcoming opportunities.
– Join online artist groups on Facebook or LinkedIn, where members often post residency or grant opportunities.

Newsletters and Mailing Lists

– Sign up for newsletters from arts organizations, galleries, and foundations. Many grants and residencies are announced directly through these channels.


2. Understanding the Types of Support

It’s important to know what you’re applying for and how it aligns with your current needs:

Art Grants

Grants are typically financial awards that don’t require repayment. They can cover costs like project development, exhibitions, or personal artist growth. Look for grants that focus on your medium, your geographic location, or your demographic (e.g., emerging artists, women, LGBTQ+).

Residencies

Residencies offer time and space to create art, often providing studios, housing, and stipends. They’re ideal if you’re seeking a period of uninterrupted work or want to immerse yourself in a new environment. Some residencies may require you to engage with the local community through workshops or exhibitions.

Fellowships

Fellowships are typically longer-term programs that provide financial support and mentorship. They’re often highly competitive and prestigious, helping to elevate your career. Fellowships may require a body of work to be completed during the program or have a research-based component.


3. Preparing Your Application

Once you’ve identified the right opportunities, it’s time to prepare your application. While each grant, residency, or fellowship will have specific guidelines, certain elements are almost always required.

Artist Statement

Your artist statement should clearly define your artistic practice, philosophy, and goals. Keep it concise—no more than 300 words. Tailor your statement to align with the values and mission of the grant or residency you’re applying to. This shows the selection committee that you’ve done your research and understand how your work fits into their vision.

Project Proposal for Grants

For grants, you’ll likely need to submit a proposal that outlines the project you plan to complete if awarded the funding. Be specific. Include details about the medium you’ll be working in, the themes you’ll explore, and how the grant will help you achieve your artistic goals. Ensure your proposal is realistic within the grant’s budget and timeline.

Portfolio of Work

Your portfolio is the heart of your application. Include a carefully curated selection of your best and most recent work—usually 8 to 15 pieces. Make sure each piece has a high-quality image and includes a brief description, including the medium, dimensions, and any relevant background information. Tailor the portfolio to the grant or residency focus, emphasizing the works most in line with their mission.

Letters of Recommendation for Fellowships

Some fellowships require letters of recommendation. Reach out to mentors, professors, or peers who are familiar with your work and can speak to your talent and potential. Provide them with plenty of notice and a summary of the fellowship, so they can tailor their letters accordingly.


4. Tips for Writing a Compelling Application

Start Early

Give yourself plenty of time to complete the application. Start well before the deadline to avoid last-minute stress and allow time for revision. A rushed application can result in small mistakes or unclear ideas.

Follow the Guidelines

Carefully read the application instructions. Failing to follow guidelines can disqualify you immediately, no matter how strong your application is. Pay attention to word counts, formatting requirements, and deadlines.

Be Authentic

Your application should reflect who you are as an artist. Don’t try to mold your work to fit the perceived expectations of the selection committee. Authenticity can set you apart from other applicants.

Tell a Story

When writing your project proposal or artist statement, think of it as storytelling. Explain not just what you’re doing, but *why* you’re doing it. What drives your art? What impact do you hope to have? A compelling narrative can make your application more memorable.

Demonstrate Impact

Especially for grants, it’s crucial to demonstrate the potential impact of your project. Explain how the funding will enable you to complete work that could have a wider cultural or community effect. If applicable, mention how you’ll share the results (e.g., through exhibitions, publications, or community engagement).

Finding and applying for art grants, residencies, and fellowships can be a game-changer for your career. While the process may seem daunting, taking the time to craft a thoughtful and compelling application can increase your chances of success.

Ready to Take Your Art to the Next Level?

Whether you’re applying for grants or just looking to sharpen your skills, having the right guidance can make all the difference. At Hodis Learning & Music, we offer personalized one-on-one art lessons tailored to your creative goals. From building a professional portfolio to refining your technique, we’re here to support you on your artistic journey. Call us or submit a form to begin music lessons today.

The importance of art and music in homeschool education

In the academically-focused world of homeschool education, the inclusion of art and music can sometimes be an afterthought. However, the integration of the arts into homeschooling is not just beneficial but essential for fostering a well-rounded and enriching learning experience. Art and music education play a pivotal role in developing creative, expressive, and innovative learners. This blog post highlights the importance of arts in education and offers guidance on integrating visual arts, music, drama, and dance into daily lessons.


Emphasizing Creativity and Expression

The arts provide a unique platform for self-expression and creativity, allowing students to explore their feelings, ideas, and perspectives in a way that words alone cannot. Through activities in drawing, painting, sculpting, music, dance, and drama, students learn to communicate complex thoughts and emotions. This expressive capability is crucial not only in developing personal identity and emotional intelligence but also in enhancing problem-solving and critical thinking skills.


Visual Arts: A Window to the World

Integrating visual arts into homeschooling can start with simple projects like sketching objects from nature, creating family portraits, or designing imaginative landscapes. Encourage exploration of different mediums – pencils, crayons, markers, paints – and techniques to provide a comprehensive understanding of visual expression. Homeschoolers have the flexibility to take inspiration from their immediate environment, incorporating lessons from history, culture, and even mathematics into art projects. For instance, geometric shapes and patterns can be a fun way to merge math with art.


Music: The Universal Language

Music education is about more than just learning to play an instrument. It encompasses understanding rhythm, melody, harmony, and the cultural contexts from which music originates. Start by introducing a variety of music genres from classical to folk to jazz, encouraging an appreciation for the diversity of musical expression. For hands-on learning, consider simple instruments like recorders or ukuleles for beginners, gradually progressing to more complex instruments (e.g., guitar, piano, etc.) as interest and skills develop. Incorporating music theory, songwriting, and composition can also enrich the musical learning experience.


Drama and Dance: Movement and Storytelling

Drama and dance education in homeschooling can be particularly engaging, offering students the chance to explore narratives, characters, and emotions through movement and role-play. Simple activities like miming, improvisational games, and storytelling exercises can significantly enhance verbal and non-verbal communication skills. Choreographing dance routines or producing mini-plays are excellent ways for students to work collaboratively, fostering teamwork and empathy.


Practical Tips for Integrating the Arts

  1. Dedicate Time Each Week: Allocate specific times in your homeschool schedule for arts education to ensure consistent engagement.
  2. Use Online Resources: There are countless online tutorials, classes, and resources available for art and music education that can guide your teaching and provide inspiration.
  3. Attend Workshops and Events: Take advantage of local art galleries, museums, concerts, and theater productions to provide real-world exposure to the arts.
  4. Encourage Personal Projects: Give students the freedom to pursue personal projects in areas of their interest within the arts, fostering independence and self-motivation.
  5. Hire An Expert Art or Music Teacher: Consider hiring a teacher to teach art and music homeschool classes. While Hodis Learning & Music offers expert, 1-on-1 art instruction and music lessons, we also offer homeschool classes in these areas. Call or email us today to learn more about our homeschool education program.


Conclusion

The inclusion of art and music in homeschooling enriches the educational landscape by fostering creativity, expression, and cultural appreciation. By integrating the visual arts, music, drama, and dance into daily lessons, parents can offer a holistic learning experience that prepares students not just academically, but also emotionally and socially for the world beyond. The arts are not merely a supplement to education; they are a vital component of a comprehensive learning journey.

How to Critique Art Constructively

Art is deeply personal; oftentimes the work we create is a reflection of who we are and what we’ve experienced. Because of how personal art is, receiving criticism can be an emotional experience. However, constructive critique can be an invaluable tool for growth. Whether you’re critiquing someone else’s work or receiving feedback on your own, it’s important to approach the process with respect, curiosity, and the shared goal of improvement.

Here’s how to critique art respectfully in order to foster a supportive and creative learning environment.


Start With the Positive

When offering feedback, begin with what you appreciate about the artwork. Acknowledging the strengths of a piece first creates a positive foundation for the conversation. It lets the artist know you’ve seen and appreciate their work. Compliment the artist’s technique, use of color, composition, or even the emotions the piece evokes. These compliments help build confidence and help the artist to feel more open to constructive suggestions.

Example: “I love how the color palette creates a calming atmosphere, and the texture really draws me in.”


Be Specific and Actionable

Vague feedback can be frustrating and unhelpful. Instead of saying something broad like “It’s not working for me,” point to specific areas and suggest ways the artist can improve. Constructive criticism is most effective when it’s tied to something actionable.

Example: “The main focus of the image is great, but the lack of detail in the foreground feels a bit flat. Maybe playing with the depth of field to bring more texture to the rocks or foliage could add more dimension to the overall composition.”


Consider the Artist’s Intent

Before critiquing, take time to understand the artist’s goals and intentions with the piece. Ask questions like, “What message were you trying to convey?” or “Is there a specific technique you’re exploring?” Aligning your feedback with their artistic vision shows respect and can help them refine their ideas without derailing their creative process.

Example: “Since you mentioned wanting the figure to appear as if it’s reaching forward in a moment of action, one thing that could help strengthen that effect is adjusting the angle of the upper body.”


Stay Constructive and Respectful

Constructive criticism means offering insights that help improve the work, not diminish the artist’s confidence. Avoid using harsh or dismissive language that can be discouraging. Frame your feedback as suggestions rather than demands, and always maintain a respectful tone.

Example: “I think adding more variation to the brushstrokes could enhance the movement in this section. What do you think?”


Encourage Experimentation

Art is about exploration, and sometimes experimentation leads to breakthroughs. Encourage the artist to take risks, even if it means their piece isn’t perfect. Growth often happens when an artist steps out of their comfort zone.

Example: “It’s great that you experimented with different textures here. What would happen if you pushed this even further in your next piece?”


How to Receive Criticism Constructively

Being on the receiving end of critique can be challenging, but by keeping an open mind, you can experience personal and artistic growth.


1. Listen Without Defending

It can be tempting to explain your choices or defend your work, but try to listen fully before responding. Understand the perspective of the person giving the critique and consider how their feedback might enhance your work.


2. Ask for Clarification

If the feedback is unclear, don’t be afraid to ask for more details. Understanding the specifics of what someone is pointing out can help you apply the critique more effectively.


3. Reflect and Decide

Not all feedback will resonate with you, and that’s okay. After receiving a critique, take time to reflect. Decide which suggestions align with your goals and vision, and discard the ones that don’t.

Conclusion

Learning how to give and receive critiques is an essential part of artistic development. By embracing a constructive and supportive approach, both students and artists can improve their craft, deepen their understanding, and continue to push creative boundaries. If you’re looking to further enhance your skills and be part of a nurturing art community, our one-on-one art lessons provide personalized guidance tailored to your needs. Call us or submit a form to get started today.